

 UTAH EDUCATION NETWORK

 Justin
 Dani
Dani Rob
Rob Val
Val Kayla
Kayla
Article Editor Tutorial
Log-in | New Article | Edit Article | Add Article Images | Delete Article Images | Delete Article
Log-in
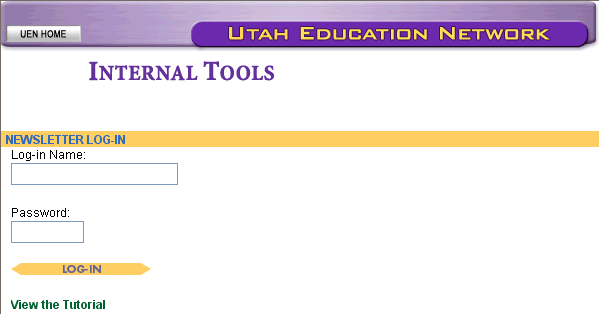
1. Enter your UEN Log-in Name and Password and then use the Log-in button.
If you have been given privileges to this tool, you will arrive at the Main Menu screen.
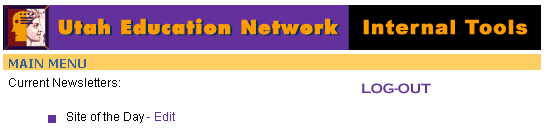
2. Use the Edit link next to the Newsletter you wish to edit. This will take you to the Newsletter's edit menu.
New Article
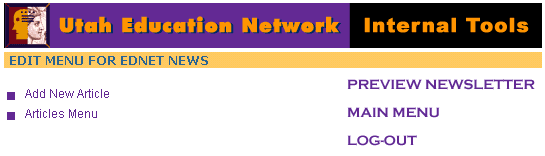
3. To add a new article, use the "Add New Article" option.
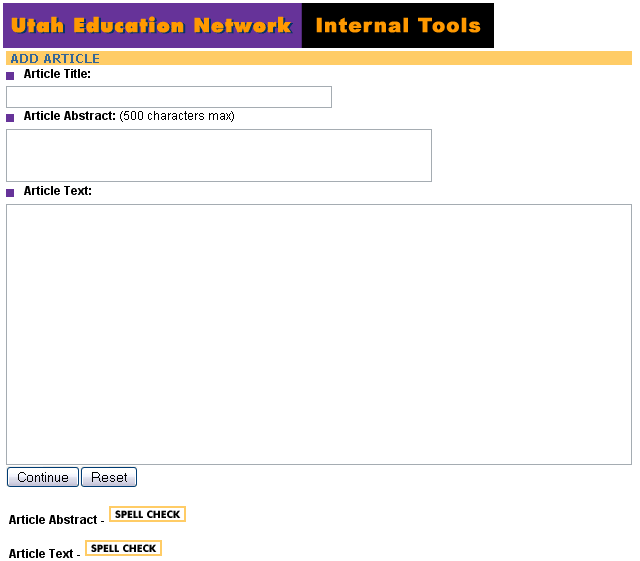
4. Provide an Article title, abstract, and text.
- The Article abstract is the "teaser" that is displayed on the Newsletter's front page.
- Experienced users may choose to include HTML tags in the Article Text box for a more pleasing layout.
- You may find this HTML Cheatsheet to be helpful.
5. Use the "Continue" button when you have finished the article.
This will take you to the "Edit Article" screen.
Edit Article
Note: You can edit an article either by using the "Articles Menu" option from the Newsletter's edit menu or immediately after creating an article.

6. To edit the article text, use the "Edit Article" link, make any necessary changes and use the "Continue" button.
7. Use the "Change Article Date" option to set the article publication date and the time. This allows you to determine when an article gets displayed on the Newsletter's front page.
Add Article Images
8. To add an image to the article, use the "Add / Edit Article Images" option on the Article edit screen.
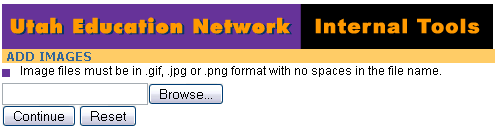
9. Use the "Browse" button to open a dialog box that displays the contents of the local computer. Scroll through the file directories and select the image you want, and then use the "Open" button.

The name and path of the file will appear. (Remember that the file name of the image must not have any spaces in it, and the image needs to be either in the .jpg, .gif, or .png format with the appropriate three letter extension.)
10. Use the "Continue" button.
This will take you to the next "Add Images" screen.
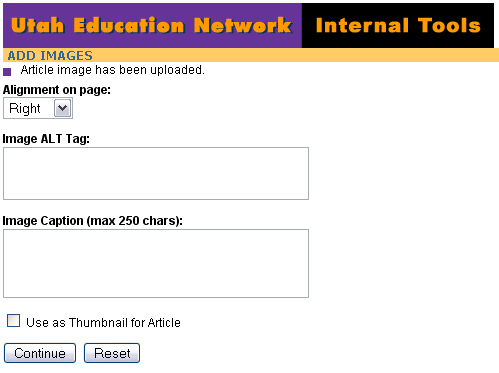
11. Select the desired alignment from the drop down menu.
12. Provide a very brief description of the image in the ALT Tag field.
13. You may choose to include a caption for your image. This is optional.
14. If you check the box in front of "Use as Thumbnail for Article" a copy of the image will appear on the Newsletter's front page. Note: Thumbnail images should be no larger than 100 x 100 pixels.
15. Use the "Continue" button. This will return you to the Edit Article screen.
Use the "Preview Article" button to view your article. This will open up a new browser window.
Delete Article Images
16. To delete an article image, use the "Add / Edit Article Images" option on the Edit Article screen.
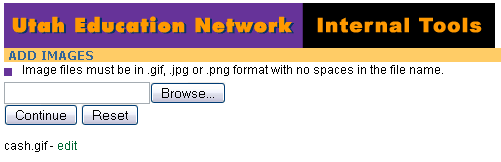
The images that are currently associated to this article will be listed beneath the "Continue" button.
17. Use the "Edit" link next to the image you want to delete. This will take you to the Edit Image screen.
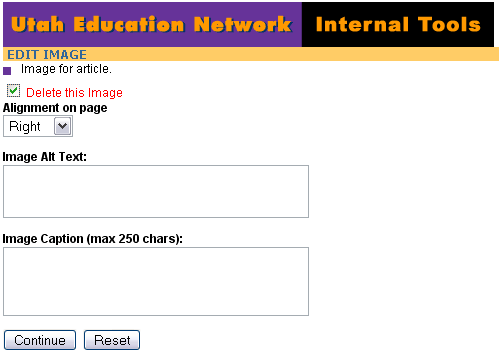
18. Check the box next to the red text "Delete this Image" and use the "Continue" button.
This will return you to the Edit Article screen.
Delete Article
19. To delete an article, use the "Delete Article" option on the Edit Article screen.
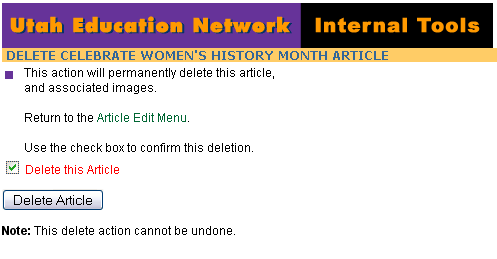
20. Check the box next to the red text "Delete this Article" and use the "Delete Article" button.
When you are done with your Newsletter, use the "Log-Out" button.